Join Our Newsletter And Save 50%* On Your First Order
Get the lowdown on exciting updates, new products, exclusive discounts, and more.
*Good on WellspringCBD and Weltaday branded products only.
Get the lowdown on exciting updates, new products, exclusive discounts, and more.
*Good on WellspringCBD and Weltaday branded products only.


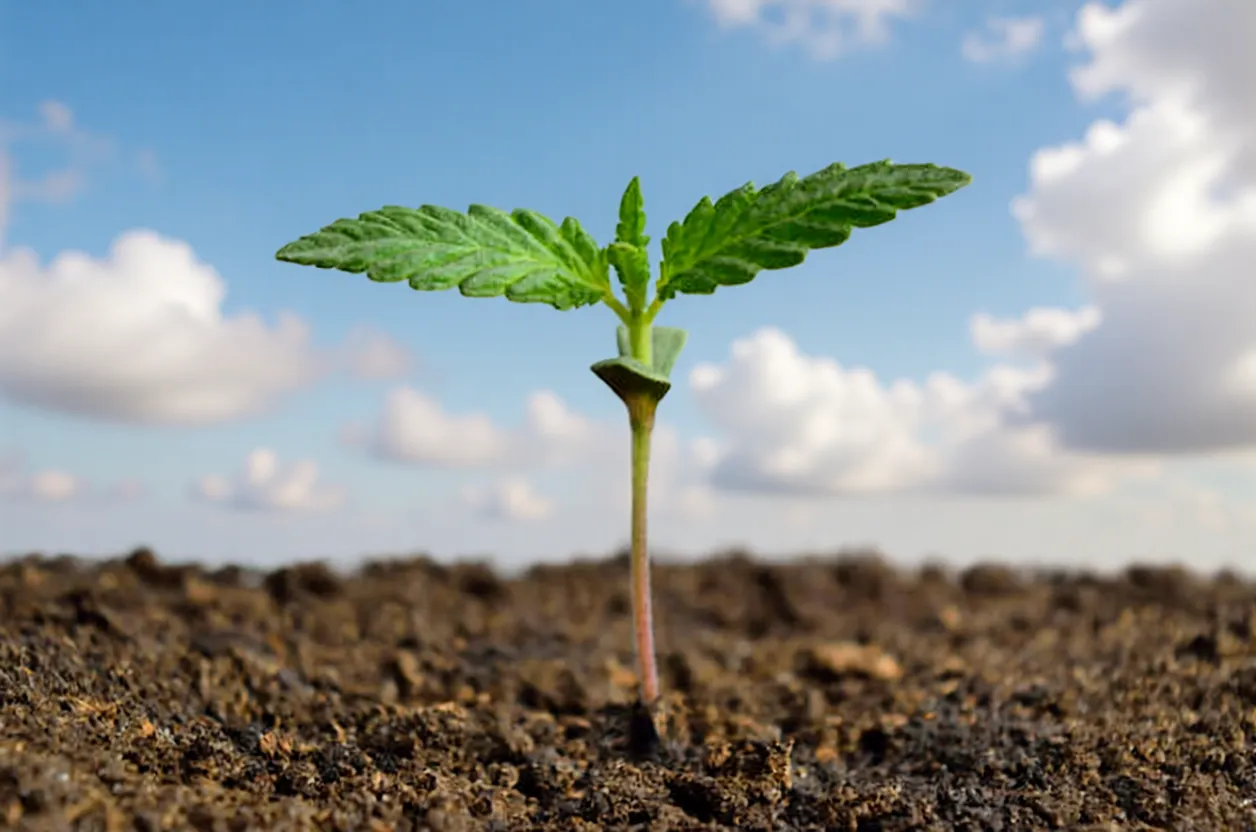

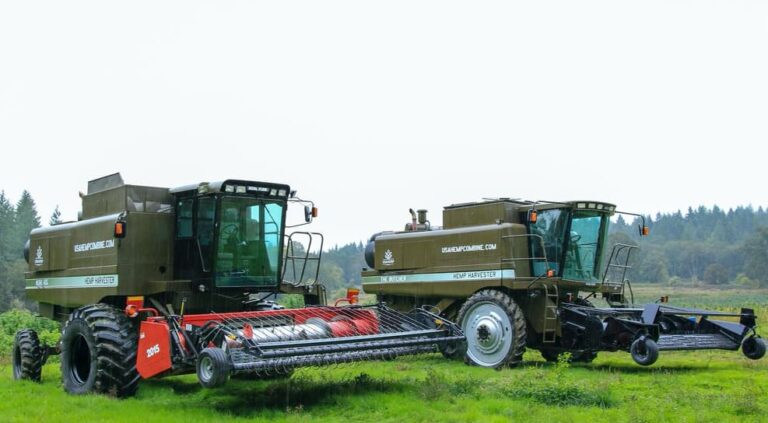
Hemp is a versatile plant that has been cultivated for thousands of years for its numerous industrial and medicinal uses.
It is a variety of the Cannabis sativa plant species, but it contains minimal levels of THC, the psychoactive compound found in marijuana. Instead, hemp is primarily grown for its fiber, which can be used to make paper, textiles, and construction materials, and for its seeds, which are a valuable source of nutrition. Hemp cultivation has gained popularity in recent years, thanks to its potential for environmentally-friendly and sustainable production.
In this step-by-step guide, we will explore the process of planting hemp, from germination to harvest, providing valuable insights for both novice and experienced hemp growers.
Growing hemp offers numerous benefits, making it a popular choice for farmers and enthusiasts alike. From its versatility as a crop to its positive impact on the environment, there are several reasons why cultivating hemp is advantageous.
One of the key benefits of growing hemp is its fast growth cycle. Hemp plants have a relatively short lifecycle, typically maturing in about three to four months. This means that farmers can achieve multiple harvests in a single year, increasing their potential profits.
Furthermore, hemp is a hardy plant that can adapt to various climates and soil conditions. It requires minimal irrigation, making it a great choice for regions experiencing water shortages or tough growing conditions. Additionally, hemp plants have deep roots that help prevent soil erosion and improve the quality of the soil, making it a valuable option for farmers looking to enhance their land.
Another advantage of growing hemp is its wide range of applications. Hemp crops can be utilized for various purposes, including hemp fiber production. Hemp fibers are known for their strength and durability, making them ideal for textiles, rope, and construction materials. Moreover, hemp seeds can be pressed to extract oil, which can be used in the production of food, cosmetics, and biofuel. The versatility of hemp makes it a valuable crop for farmers and industries alike.
Hemp cultivation also benefits the environment in numerous ways. As a fast-growing plant, hemp absorbs large amounts of carbon dioxide from the atmosphere, helping mitigate climate change. Additionally, hemp crops require fewer pesticides and herbicides compared to other crops, reducing the negative impact on natural ecosystems and promoting biodiversity.
Furthermore, hemp cultivation can provide economic opportunities for farmers and communities. With the growing demand for hemp-derived products, farmers can tap into a profitable market and diversify their income streams. Additionally, the hemp industry has the potential to create jobs and stimulate local economies.
Growing hemp provides a range of benefits for farmers and the environment. Its fast growth cycle, adaptability, versatility, and positive impact on the environment make it an attractive choice for agricultural practices. Moreover, hemp cultivation offers economic opportunities and the potential for sustainable development. By embracing hemp farming, individuals can contribute to a greener future while reaping the rewards of this versatile and valuable crop.
When it comes to growing hemp, there are several different types of crops that farmers can choose from. Each type has its own unique characteristics and uses, allowing farmers to select the best option for their specific goals and requirements. Here are some of the most common types of hemp crops:
1. Industrial Hemp: This is the most widely grown type of hemp crop. Industrial hemp is primarily cultivated for its strong fibers, which are used in the production of textiles, paper, and construction materials. It has a low THC (tetrahydrocannabinol) content, which means it does not have psychoactive effects and is not grown for recreational or medicinal purposes.
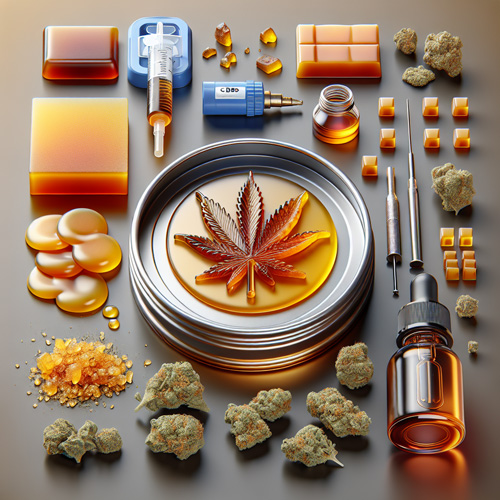
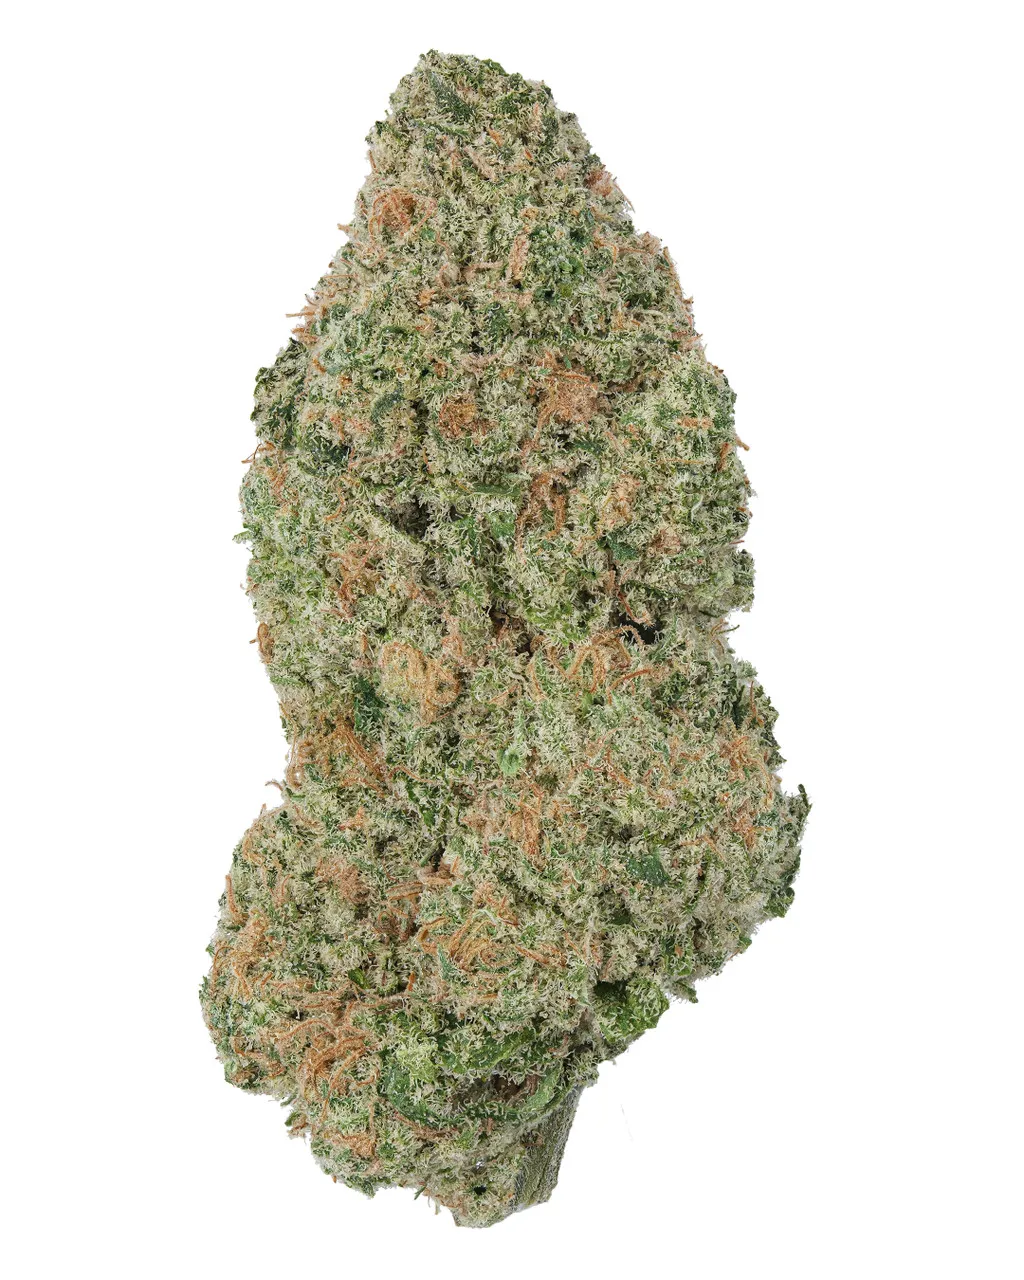
2. CBD Hemp: With the increasing popularity of CBD (cannabidiol) products, CBD hemp crops have become highly sought after. These crops are specifically grown for their high CBD content, which is extracted from the flowers and leaves of the plant. CBD is known for its potential therapeutic benefits and is utilized in various forms, including oils, tinctures, and topical products.
3. Seed Hemp: Seed hemp crops are cultivated for their nutritious and oil-rich seeds. These seeds are packed with essential fatty acids, proteins, and vitamins, making them a valuable ingredient in food products, such as protein bars, salad dressings, and hemp milk. Seed hemp crops require specific conditions and care to ensure optimal seed production.
4. Dual-Purpose Hemp: As the name suggests, dual-purpose hemp crops can serve multiple purposes. These crops are cultivated for both their fibers and seeds, offering farmers the opportunity to take advantage of various market demands. Dual-purpose hemp requires careful harvesting and processing to maximize both fiber and seed yields.
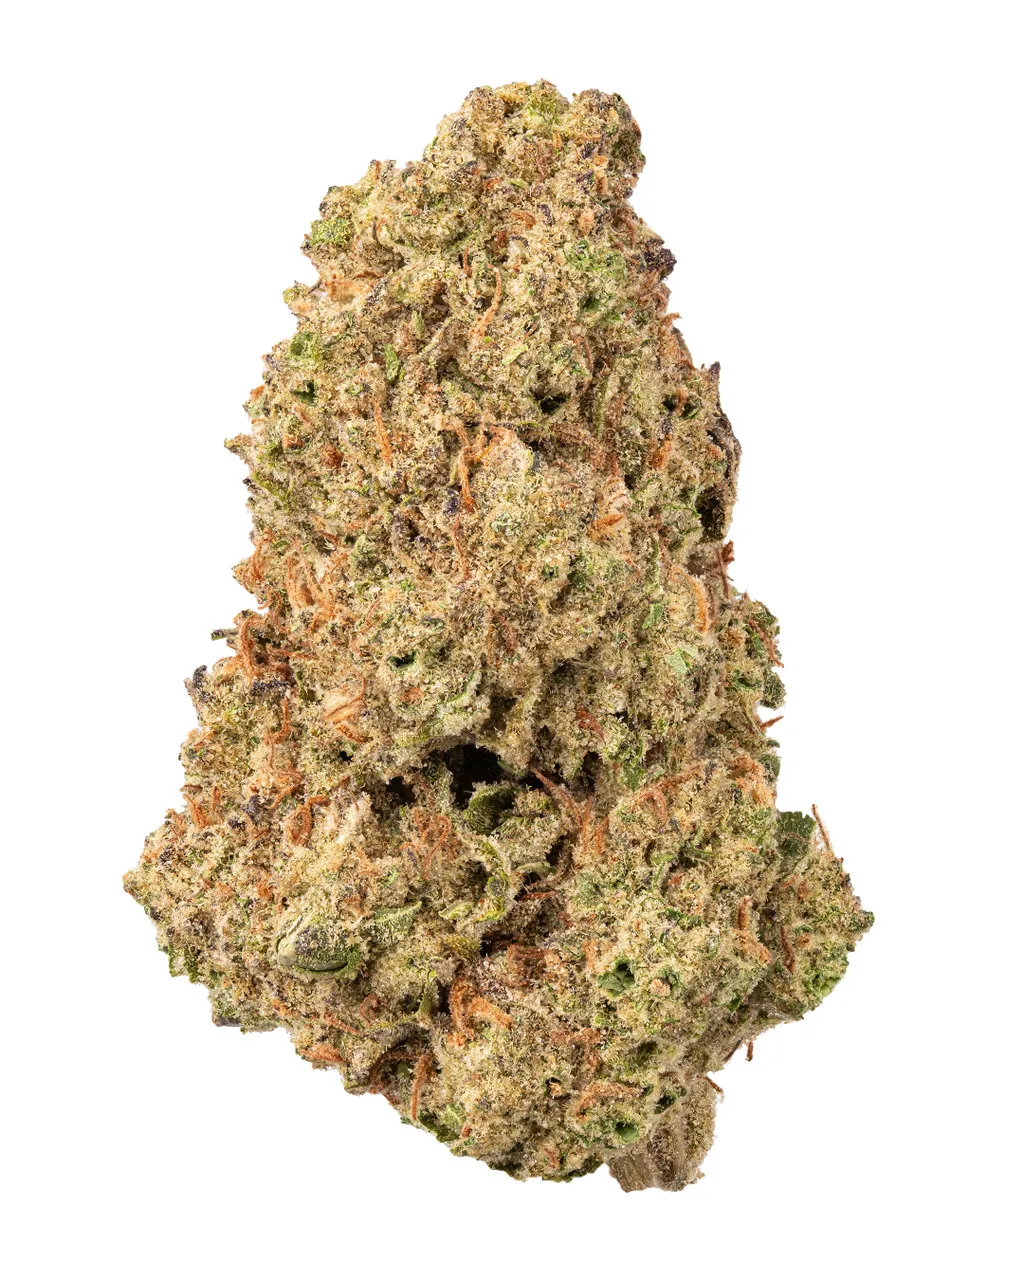
5. Smokable Hemp: Smokable hemp crops are grown for their high CBD content and are intended for use in the form of smokable products, such as hemp cigarettes or pre-rolled joints. These crops require specific genetics that produce high-quality CBD flowers with desirable aromas and flavors. Smokable hemp has gained popularity among consumers seeking a non-intoxicating alternative to traditional cannabis.
When selecting a type of hemp crop, it is crucial for farmers to consider their target market, local regulations, and the specific growing conditions of their region. Each type of crop requires different care and management techniques to ensure optimal yields and quality. Consulting with experts or agricultural centers can provide valuable guidance in choosing the right type of hemp crop for a successful cultivation venture.
The variety of hemp crops available provides farmers with numerous options to cater to different consumer demands and industries. Whether it’s industrial hemp for textiles, CBD hemp for medicinal purposes, seed hemp for nutrition, or smokable hemp for alternative smoking experiences, farmers have the opportunity to tap into a versatile and profitable market. With proper care and attention, hemp cultivation can offer sustainable and lucrative opportunities for farmers worldwide.
When embarking on a hemp planting journey, one of the most crucial decisions a grower must make is choosing the right seeds. The seed selection process can significantly impact the success and outcome of the entire cultivation endeavor. Here are some key factors to consider when choosing hemp seeds:
1. Purpose: Determine the purpose of your hemp crop. Are you growing for fiber production, seed production, or CBD extraction? Each purpose requires specific seed varieties. Industrial hemp varieties are typically used for fiber production, while seed hemp varieties are cultivated for their nutritious seeds. CBD hemp varieties, on the other hand, are bred for high CBD content in their flowers and leaves.
2. Genetics: Understanding the genetics of hemp seeds is vital. There are two main types of hemp seeds: regular seeds and feminized seeds. Regular seeds have a balanced mix of male and female plants, while feminized seeds guarantee a higher percentage of female plants. Female plants are desirable for fiber and seed production, while CBD extraction often requires an all-female crop to maximize CBD levels.
3. Germination: Look for seeds with high germination rates to ensure a healthy and successful start. Low-quality seeds may have low germination rates, leading to poor seedling growth and decreased overall yields. Check for reputable seed suppliers known for high-quality seeds to increase your chances of success.
4. Growing Conditions: Consider your location and the specific growing conditions you have available. Different hemp varieties have different environmental requirements, including temperature, humidity, and day length. Some varieties thrive in specific climates, while others are more adaptable. Choose seeds suitable for your specific growing conditions to optimize plant health and productivity.
5. Regulations: Familiarize yourself with local regulations regarding hemp cultivation. Different regions may have restrictions on the THC content allowed in hemp crops. Ensure the seeds you choose comply with these regulations to avoid legal issues and ensure a smooth cultivation process.
6. Seed Certification: Opt for certified seeds when possible. Certified seeds have undergone rigorous testing to verify their genetic purity, germination rates, and absence of contaminants. While certified seeds may be more expensive, they offer assurance and peace of mind, knowing that you are starting with a reliable and high-quality genetic foundation.
7. Personal Preferences: Take your personal preferences into account. Consider factors such as taste, aroma, and overall plant characteristics. Some growers may prioritize certain terpene profiles or specific cannabinoid ratios. Look for seed descriptions and reviews that align with your preferences to ensure you are pleased with the final product.
Choosing the right seeds is a crucial step in the hemp planting process. By considering the purpose, genetics, germination rates, growing conditions, regulations, seed certification, and personal preferences, growers can make informed decisions that set them up for a successful and rewarding cultivation experience. Don’t hesitate to seek advice from experienced hemp growers or consult with agricultural centers for further guidance and support.
When it comes to growing hemp, choosing the right seeds is crucial for a successful and productive crop. One important decision to make is whether to use feminized seeds or regular seeds. Each type has its own advantages and considerations, so let’s take a closer look at feminized versus regular hemp seeds.
Regular hemp seeds consist of a mix of male and female plants, which means you have a roughly equal chance of growing both sexes. This can be advantageous if you’re planning to produce seeds or if you want to maintain the genetic diversity of the crop. Regular seeds are also typically more affordable compared to feminized seeds.
On the other hand, feminized hemp seeds guarantee a higher percentage of female plants, usually around 99%. This is beneficial for growers who are primarily interested in flower or seed production as female plants are the ones that produce the desired flowers and seeds. With feminized seeds, you can maximize the yield of your crop by eliminating the need to remove male plants during the vegetative stage, as they do not produce usable flowers or seeds.
Feminized hemp seeds also save time and effort, as you can focus your resources on cultivating only the female plants. This is especially important for CBD extraction, where female plants with high CBD content are desired. By using feminized seeds, you can ensure that your entire crop is dedicated to CBD production, maximizing the potential for high-quality CBD extracts.
It’s worth noting that feminized seeds are generally more expensive compared to regular seeds due to the specialized breeding techniques used to produce them. However, the increased yield and efficiency they offer may outweigh the higher upfront cost for many growers.
Ultimately, the choice between feminized and regular hemp seeds depends on your specific goals and circumstances. If you prioritize genetic diversity, seed production, or have a limited budget, regular seeds may be the preferred option. On the other hand, if you’re focused on CBD extraction or higher flower and seed yields, feminized seeds are likely the better choice.
Regardless of the type of seeds you choose, always ensure they are of high quality from reputable seed suppliers. This will help ensure good germination rates, healthy plants, and optimal yields. Take the time to research and evaluate your specific needs and preferences to select the best seeds for your hemp cultivation journey.
When it comes to purchasing hemp seeds, it is crucial to buy from a reputable source. With the increasing popularity of hemp cultivation, there has been a surge in seed suppliers, offering a wide range of products. However, not all sources are created equal, and it is essential to do your due diligence before making a purchase.
First and foremost, buying from a reputable source ensures that you are getting high-quality seeds. Reputable suppliers have strict quality control measures in place to guarantee the genetic integrity and viability of their seeds. They invest in research and development, employing advanced breeding techniques to produce superior strains that are stable, reliable, and genetically consistent.
Another advantage of buying from a reputable source is that you can expect accurate labeling and detailed information about the seeds. They provide essential information about the strain, including its characteristics, growth cycle, expected yield, and cannabinoid content. This information is invaluable when planning your cultivation process and helps you make informed decisions about which seeds are best suited to your specific needs.
Moreover, reputable seed suppliers prioritize customer satisfaction and provide excellent customer support. They are available to answer any questions or concerns you may have about the seeds, cultivation techniques, or any other related topic. Their expertise and guidance can be invaluable, especially for novice growers who are venturing into hemp cultivation for the first time.
One way to ensure that you are buying from a reputable source is to look for certifications or memberships to industry associations. Reputable suppliers often adhere to strict industry standards and voluntarily subject themselves to third-party audits and certifications. These certifications provide assurance that the seeds meet specific quality benchmarks and are free from contaminants.
Additionally, it is beneficial to read reviews and seek recommendations from fellow growers or industry experts. Their first-hand experiences can give you valuable insights into the reliability and quality of different seed suppliers. Online forums, social media groups, and industry events are great platforms to connect with others and gather information about reputable sources.
Lastly, buying from a reputable source not only ensures the quality of your seeds but also supports the sustainability of the hemp industry. Reputable suppliers engage in ethical and sustainable practices, such as using organic cultivation methods and supporting local farmers. By choosing a reputable source, you contribute to the growth and development of the industry while promoting environmentally responsible practices.
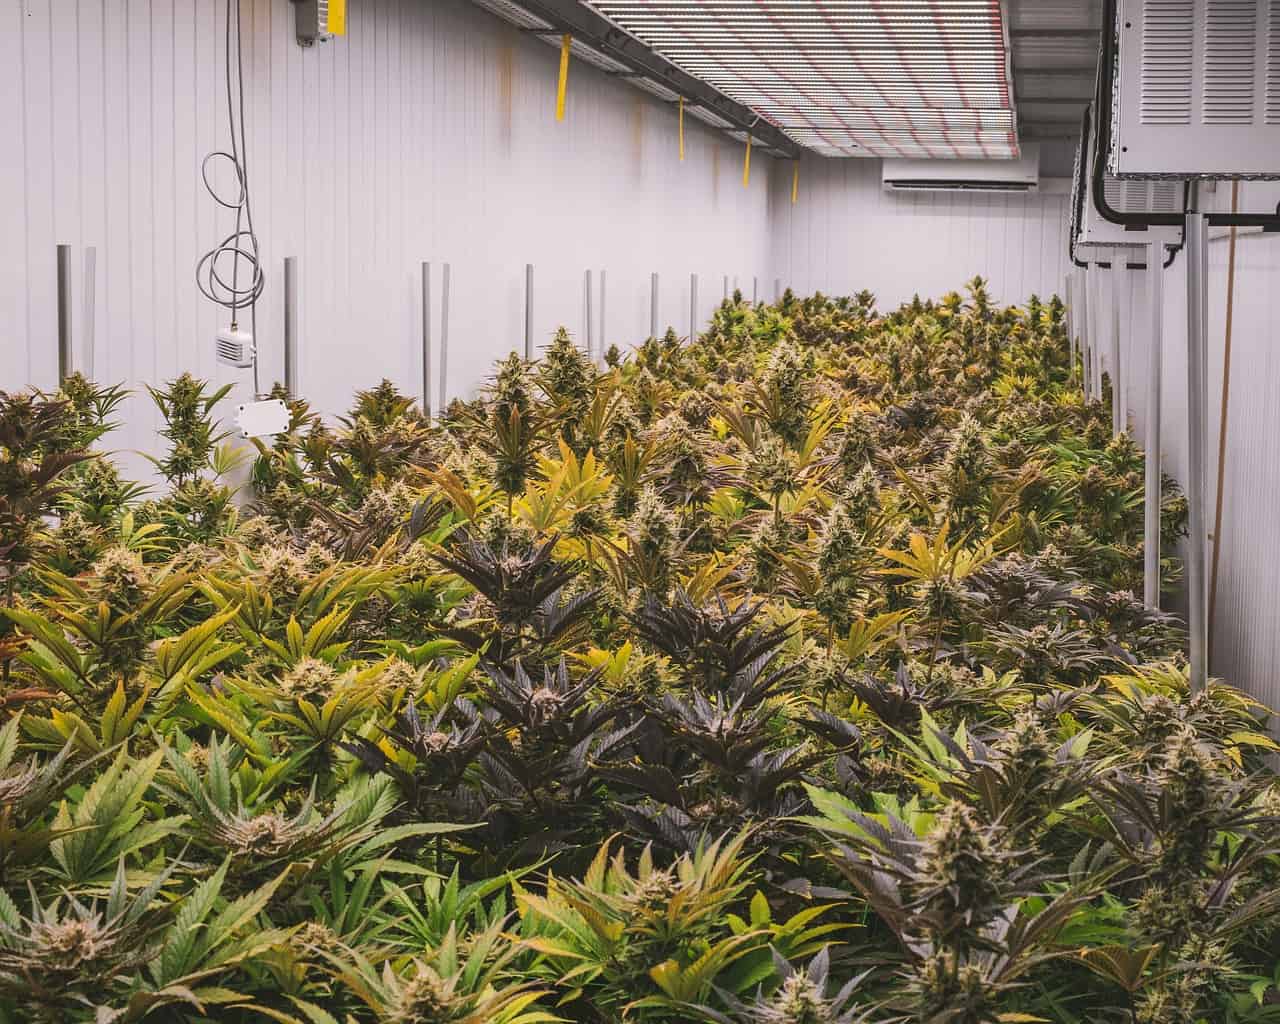
If you’re looking to cultivate hemp and are considering starting the process indoors, there are a few key steps to ensure the success of your plants. While hemp can be grown outdoors, indoor cultivation offers greater control over environmental factors and allows for year-round growth. Here’s a step-by-step guide to help you prepare and plant your hemp seeds indoors.
1. Set Up Your Growing Space:
Before planting your seeds, it’s important to create an optimal environment for your plants. Choose a suitable area in your home or use a dedicated grow room or tent. Ensure the space is well-ventilated, has access to electricity, and can be easily controlled for temperature and humidity.
2. Gather Your Equipment:
To plant and grow hemp successfully indoors, you’ll need some essential equipment. This includes grow lights, such as fluorescent lights or LED panels, to provide the necessary hours of light for your plants. You’ll also need a grow medium, such as coco coir or a soil mix specifically formulated for hemp cultivation. Other equipment includes pots or trays for germination, a thermometer, a hygrometer to measure humidity, and fans for air circulation.
3. Germination Stage:
Start by germinating your hemp seeds. One popular method is the paper towel method. Moisten a paper towel, place your seeds on it, and fold the towel over to cover the seeds. Ensure the towel is damp but not soaking wet. Store the towel in a dark, warm place and check for germination after a couple of days. Once the seeds have sprouted and developed a small taproot, they are ready for planting.
4. Planting Your Seeds:
Prepare your chosen grow medium by filling pots or trays. Make a small hole in the center of each pot or tray, about 0.5 to 1 inch deep. Place the germinated seeds in the holes, ensuring the taproot is facing downward. Gently cover the seeds with the grow medium and lightly tamp it down. Mist the soil or medium with water to provide moisture.
5. Provide Proper Lighting:
For healthy and vigorous growth, hemp plants require the right amount and spectrum of light. During the vegetative stage, which typically lasts around 4 to 6 weeks, provide your plants with 18-24 hours of light each day. As the plants transition into the flowering stage, reduce the light cycle to 12 hours of light followed by 12 hours of uninterrupted darkness to simulate natural light conditions.
6. Maintain Optimal Environmental Conditions:
Monitor the temperature and humidity levels in your growing space. Hemp plants thrive in temperatures between 68-77°F (20-25°C) during the vegetative stage and slightly cooler temperatures of around 65-75°F (18-24°C) during the flowering stage. Keep the humidity between 40-60% during the vegetative stage and reduce it to 30-40% during the flowering stage to prevent mold and mildew growth.
7. Provide Proper Care and Nutrition:
Regularly inspect your plants for any signs of nutrient deficiencies, pests, or diseases. Hemp plants generally require moderate water and nutrient levels. Start with a balanced fertilizer specifically designed for hemp cultivation, and adjust as needed based on your plants’ response. Remember to also provide adequate airflow and avoid overwatering to prevent root rot.
By following these steps and providing the necessary care, you’ll be well on your way to successfully growing hemp plants indoors. Throughout the growth cycle, keep a close eye on your plants, make necessary adjustments, and enjoy watching them thrive in your indoor garden. Happy hemp cultivation!
When it comes to cultivating hemp indoors, two crucial factors to consider are the grow medium and the light cycle. These elements play a significant role in the overall health and productivity of your hemp plants. Let’s dive into each aspect and explore the best practices for making informed decisions.
Grow Medium:
Choosing the right grow medium for your hemp plants is essential for providing them with the necessary nutrients, water retention, and a healthy root environment. There are several options available, but two popular choices among indoor hemp growers are coco coir and soil mixes formulated specifically for hemp cultivation.
Coco coir is a versatile and sustainable grow medium made from coconut husks. It offers excellent water retention while also allowing for proper drainage, which prevents waterlogging and reduces the risk of root rot. Coco coir also provides a neutral pH level, making it easier to adjust nutrient levels and maintain plant health.
Alternatively, you can opt for a high-quality soil mix designed for hemp cultivation. These mixes are typically enriched with organic matter and essential nutrients to support vigorous plant growth. They provide a stable medium for root development and promote microbial activity in the soil, which aids in nutrient uptake.
Light Cycle:
Light is one of the most critical factors for hemp plant growth and development. Understanding the appropriate light cycle for each stage of growth is crucial to ensure optimal yields. Hemp plants require different durations of light exposure during the vegetative and flowering stages.
During the vegetative stage, which lasts approximately 4 to 6 weeks, hemp plants need longer periods of light to encourage vegetative growth and robust root systems. Providing them with 18-24 hours of light each day is recommended. This extended exposure to light promotes faster growth, stronger branches, and healthier foliage.
As the plants transition into the flowering stage, adjusting the light cycle is necessary to simulate natural outdoor conditions. To trigger the flowering process, you should reduce the light cycle to 12 hours of light followed by 12 hours of uninterrupted darkness. This change signals the plants to shift their focus from vegetative growth to the development of flowers and buds.
To achieve consistent lighting, many indoor growers use various options such as fluorescent lights or LED panels. These energy-efficient and customizable lighting solutions allow for easy control over the light spectrum, intensity, and duration. Utilizing the appropriate light spectrum, including red and blue wavelengths, is vital for supporting different stages of growth and enhancing trichome production.
In conclusion, selecting the right grow medium and implementing the correct light cycle are crucial aspects of successful indoor hemp cultivation. Whether you choose coco coir or a specialized soil mix, ensure that your grow medium provides adequate water retention, proper drainage, and a healthy root environment. Additionally, maintain an optimal light cycle throughout the vegetative and flowering stages to maximize your hemp plant’s growth potential. Remember, paying attention to these factors will significantly contribute to the overall health, productivity, and quality of your hemp harvests.
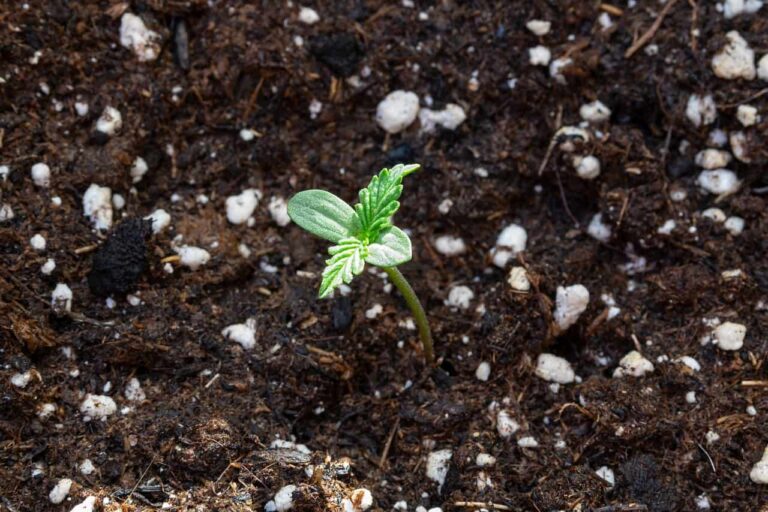
Understanding the growth cycle of hemp plants is essential for successful cultivation and maximizing yields. Like any other plant, hemp goes through various stages of growth, each with specific requirements and characteristics. Let’s take a closer look at the different phases of the hemp growth cycle and what you need to know about them.
Germination Stage:
The growth cycle begins with the germination stage, where the seed activates and starts to sprout. During this phase, it is crucial to provide the seeds with the right conditions to ensure successful germination. Many growers opt for the “paper towel method,” where seeds are placed between damp paper towels to encourage sprouting.
Vegetative Stage:
After germination, the seedling enters the vegetative stage. This period is characterized by rapid growth, as the plant develops branches, leaves, and a strong root system. To support healthy growth during this phase, it is recommended to provide your hemp plants with an extended period of light exposure – usually 18-24 hours per day. This helps promote overall plant development and prepares them for the flowering stage.
Flowering Stage:
The flowering stage is the most critical phase for hemp cultivation, as this is when the plants produce flowers and buds. During this time, hemp plants require a different light cycle to trigger the flowering process. By reducing the light exposure to 12 hours of light followed by 12 hours of uninterrupted darkness, you can stimulate the plant’s hormone production, leading to the development of flowers.
It’s important to note that the flowering stage can vary in duration, typically lasting 8-14 weeks depending on the hemp variety. During this period, closely monitor the plants for any signs of stress or nutrient deficiencies and address them promptly.
Harvest Stage:
Once the flowering stage is complete, it’s time for harvest. This is when the hemp plants are harvested for their valuable fibers, seeds, or CBD-rich flowers. The ideal time for harvest depends on the desired end product. For fiber production, harvest when the plants reach peak maturity, usually around 16-18 weeks. For CBD-rich flowers, harvest when the trichomes are fully developed and have a milky or amber color.
During harvest, carefully cut the plant at the base and hang it upside down in a well-ventilated, dark room. This drying process allows the plant to cure, breaking down chlorophyll, developing the terpene profile, and dehydrating the flowers for proper conservation.
Understanding the growth cycle of hemp plants is crucial for planning and implementing the right cultivation practices. By providing the appropriate light cycle, nutrients, and care at each stage, you can ensure healthy and productive hemp crops. Whether you’re a beginner or experienced grower, mastering the growth cycle will help you achieve successful hemp cultivation and maximize your harvests.
When it comes to hemp planting and germination, providing an ideal environment is crucial for the successful growth of your plants. By ensuring that your seeds have the right conditions, you can greatly increase the chances of a strong and healthy start. Here are some important factors to consider when creating the perfect environment for planting and germination:
1. Temperature: Hemp seeds require a stable and moderate temperature range for optimal germination. The ideal temperature for germination is around 70-85°F (21-29°C). However, it’s important to note that different varieties of hemp may have slightly different temperature preferences. To maintain the desired temperature, you can use a heating mat or a thermostat-controlled environment.
2. Humidity: Maintaining a proper level of humidity is vital during the germination stage. Hemp seeds thrive in a humid environment, usually around 70% humidity. To achieve this, you can use a humidity dome or cover your seed trays with plastic wrap. This helps to trap moisture and create a microclimate around the seeds, promoting successful germination.
3. Light: While light isn’t as crucial during the germination stage as it is during the vegetative and flowering stages, providing some indirect light can still be beneficial. Place your seeds in a well-lit area or use fluorescent lights if growing indoors. Avoid exposing them to direct light as it may dry out the seeds.
4. Moisture and Drainage: Hemp seeds need to be planted in a moist yet well-draining medium. One popular method is the paper towel method, where seeds are placed between damp paper towels to encourage sprouting. If using soil or a grow medium, ensure that it is moist but not waterlogged. Proper drainage is essential to prevent root rot and other issues that may hinder germination.
5. Nutrients: While hemp seeds contain enough nutrients to sustain the young plants during the germination stage, providing a nutrient-rich environment can give them a head start. If using soil, choose a well-balanced potting mix or add organic compost to enrich the soil. Avoid using heavy fertilizers during this early stage, as they can burn or damage the delicate roots.
6. Air Circulation: Good air circulation is important to prevent mold or fungus from developing around the seeds. Use fans or ensure that there is natural airflow in the room where the seeds are germinating. This helps to keep the environment fresh and reduce the risk of seed rot or damping-off.
By carefully considering these factors and creating an ideal environment for planting and germination, you can greatly increase the success rate of your hemp seeds. Remember to monitor the conditions closely, provide gentle care, and stay patient as you wait for the seedlings to emerge. With the right environment, your hemp plants will start off strong and healthy, setting the stage for a successful growing season.
If you’re planning to grow hemp plants outdoors, there are several important steps to take in order to prepare for a successful planting season. Here’s a step-by-step guide to help you get started:
1. Choose the Right Location: Before planting your hemp seeds, it’s crucial to select a suitable location for your outdoor grow. Hemp thrives in areas with a mild climate, plenty of sunlight, and well-draining soil. Look for a spot that receives at least 6-8 hours of direct sunlight per day and has good air circulation. Avoid areas prone to flooding or strong winds, as these conditions can damage your plants.
2. Test and Prepare the Soil: Hemp plants require a well-balanced soil pH between 6 and 7.5 for optimal growth. Conduct a soil test to determine the pH level and nutrient content of your soil. If necessary, you can adjust the pH by adding amendments such as lime or sulfur. Additionally, prepare the soil by removing any weeds, rocks, or debris. Loosen the soil with a tiller or garden fork to improve drainage and create a suitable environment for the roots to spread.
3. Germinate Your Seeds: Start by germinating your hemp seeds indoors before transplanting them outdoors. This allows you to control the germination process and ensures a higher survival rate. Use the paper towel method or a germination tray to sprout your seeds. Keep them in a warm, dark place until they have sprouted roots and small shoots. Be sure to label them if you’re planting different strains.
4. Harden Off Your Seedlings: Before transplanting your seedlings outdoors permanently, they need to be acclimatized to the outdoor environment. This process is known as hardening off and involves gradually exposing the plants to outdoor conditions. Begin by placing your seedlings in a shaded area outside for a few hours each day, gradually increasing their exposure to direct sunlight and outdoor temperatures over a period of one to two weeks. This helps prevent shock and allows the plants to adjust to the differences in temperature, wind, and light intensity.
5. Prepare Planting Holes: While your seedlings are hardening off, prepare the planting holes in your outdoor garden. Dig holes that are deep and wide enough to accommodate the plant’s root system. Space the holes at least 2-3 feet apart to allow for proper airflow and sunlight penetration. Remove any remaining weeds or grass from the planting area to prevent competition for nutrients and reduce the risk of plant diseases.
6. Transplant with Care: Once your seedlings have been hardened off and the planting holes are ready, it’s time to transplant your hemp plants into the outdoor garden. Gently remove the seedlings from their containers or trays, being mindful not to damage the delicate roots. Place each plant in a prepared hole and fill in the soil around the roots, lightly tamping it down to ensure good contact. Water the newly transplanted seedlings thoroughly to help settle the soil and reduce transplant shock.
By following these steps to prepare for planting your hemp seeds outdoors, you can ensure that your plants have a strong start and are well-equipped to thrive in their natural environment. Remember to provide proper care and maintenance throughout the growing season, monitoring for pests, diseases, and nutrient deficiencies.
Deciding on the right grow medium and location are essential steps for successful hemp cultivation. Let’s take a closer look at these factors and why they matter.
1. Choosing the Grow Medium: The grow medium refers to the substance in which the plants will grow their roots. There are several options to consider, including soil, coco coir, hydroponics, and even aeroponics. Each medium has its own advantages and challenges, so it’s crucial to choose one that suits your needs and resources.
– Soil: Soil is a common choice for outdoor and indoor growers alike. It provides a natural environment that allows plants to establish a healthy root system. Soil is also rich in nutrients, which can support plant growth. However, soil may require regular amendments to maintain its fertility and pH levels.
– Coco Coir: Coco coir is a soilless medium made from coconut husks. It has excellent water retention capabilities while still providing adequate drainage. Coco coir is pH neutral and usually comes pre-buffered with essential nutrients. It is a popular choice for growers looking for a more sustainable and easy-to-use alternative to soil.
– Hydroponics: Hydroponic systems involve growing plants in a nutrient-rich water solution, eliminating the need for soil altogether. This method allows for precise control over nutrient levels and pH, resulting in faster growth and potentially higher yields. However, setting up and maintaining a hydroponic system may require more expertise and investment.
– Aeroponics: Aeroponic systems suspend plant roots in the air and mist them with a nutrient-rich solution. This method maximizes oxygen exposure to the roots, resulting in rapid growth. Aeroponics requires careful monitoring and maintenance to ensure optimal nutrient delivery and prevent any root problems.
2. Selecting the Location: The location of your hemp farm or garden plays a crucial role in the success of your crop. Consider the following factors when choosing the right spot:
– Climate: Hemp thrives in areas with a mild climate, as extreme temperatures can stress the plants. Look for regions with adequate sunlight throughout the growing season, appropriate temperature ranges, and minimal risk of frost or prolonged heatwaves.
– Sunlight Exposure: Hemp plants require ample sunlight to grow and produce a high-quality yield. Choose a location with at least 6-8 hours of direct sunlight per day. Avoid areas with excessive shading from tall structures or trees.
– Wind and Air Circulation: Good air circulation is crucial for preventing pests, diseases, and mold growth. Avoid areas prone to strong, damaging winds, as they can stunt plant growth and even break stems or branches.
– Soil Quality and Drainage: Hemp thrives in well-draining soil with a pH level between 6 and 7.5. Conduct a soil test to assess its quality and nutrient content. Avoid areas with heavy clay or poorly drained soil, as it may lead to root rot and other water-related issues.
– Security and Privacy: Consider the security and privacy aspects of your chosen location, especially if you’re growing on a larger scale. Adequate fencing and protection can deter theft and unauthorized access.
By carefully considering the grow medium and location, you can set your hemp plants up for success. Understand the specific needs and challenges of each option and make an informed decision that aligns with your resources and goals. Taking these steps will help ensure healthy plants and maximize your hemp cultivation efforts.
Understanding the Environment: Key Factors for Successful Hemp Planting
When it comes to hemp planting, one of the most important factors to consider is the environment in which your plants will grow. The right conditions can make a significant difference in the success of your crop and the overall quality of your yield. Here are some key factors to keep in mind when understanding the environment for hemp cultivation.
1. Climate: Hemp plants thrive in areas with a mild climate. Extreme temperatures, whether too hot or too cold, can stress the plants and hinder their growth. Look for regions that offer adequate sunlight throughout the growing season, with temperature ranges that fall within the plant’s tolerable limits. Additionally, consider the risk of frost or prolonged heatwaves, as they can have a detrimental impact on your crop.
2. Sunlight Exposure: Hemp plants require significant amounts of direct sunlight to grow and produce high-quality yields. Aim for a location that receives at least 6-8 hours of direct sunlight per day. Avoid areas with excessive shading from tall structures or trees, as this can hinder the plant’s access to the necessary light. Remember that sunlight is one of the primary energy sources for photosynthesis, so providing ample exposure will be key to your plant’s overall health and productivity.
3. Wind and Air Circulation: Good air circulation is crucial for maintaining a healthy growing environment for your hemp plants. Adequate ventilation helps prevent the buildup of pests, diseases, and mold. It is advisable to avoid areas that experience strong, damaging winds, as they can stunt plant growth and even cause physical damage to your plants by breaking stems or branches. Look for locations that offer natural barriers or structures that can provide some protection against excessive wind.
4. Soil Quality and Drainage: The health of your hemp plants begins with the soil they grow in. Hemp thrives in well-draining soil with a pH level between 6 and 7.5. Conducting a soil test is highly recommended as it will provide valuable insights into the quality and nutrient content of the soil. Avoid areas with heavy clay or poorly drained soil, as this can lead to root rot and other water-related issues. If necessary, take steps to improve the soil quality by incorporating organic matter or adjusting the pH levels to create an optimal growing environment.
5. Security and Privacy: While not directly related to the natural environment, security and privacy are essential considerations for hemp farmers, especially those growing on a larger scale. Adequate fencing and protection can deter theft and unauthorized access to your crop. Protecting your investment and ensuring a safe growing environment is vital for the success of your hemp cultivation.
Understanding the environment in which you’ll be planting your hemp is a critical first step towards a successful crop. By considering factors such as climate, sunlight exposure, wind and air circulation, soil quality, and security, you can create the ideal conditions for your plants’ growth and optimize your yield. Remember that hemp cultivation requires careful attention to detail and a deep understanding of the plant’s unique requirements. With the right environment, your hemp plants will flourish, providing you with a bountiful harvest.
When it comes to maximizing your hemp production quality, your location plays a crucial role. By carefully selecting and optimizing your growing environment, you can enhance the quality and yield of your hemp crops. Here are some key factors to consider when maximizing your location for hemp production quality.
1. Light Exposure: As mentioned earlier, hemp plants require ample direct sunlight to thrive. Maximizing your location’s light exposure can significantly impact the quality and productivity of your crop. Consider positioning your plants in an area that receives maximum sunlight throughout the day, avoiding excessive shading from structures or trees. If you’re an indoor grower, invest in high-quality grow lights that replicate the full spectrum of sunlight. This will ensure that your plants receive the optimal amount and intensity of light, promoting healthy growth and trichome production.
2. Environmental Control: Maintaining a controlled environment is vital for maximizing hemp production quality. By controlling factors such as temperature, humidity, and airflow, you can create the ideal conditions for your plants to flourish. Consider using climate control systems, such as fans, humidifiers, and dehumidifiers, to regulate the temperature and humidity levels in your growing space. Proper airflow and ventilation help prevent the buildup of pests, diseases, and mold, ensuring a healthy and high-quality crop.
3. Soil Composition: The quality of your soil directly impacts the health and productivity of your hemp plants. Conduct a soil test to determine its nutrient content and pH levels. Based on the results, you can amend the soil with organic matter, compost, or specific nutrients to optimize its composition. Ensure that your soil has good drainage to prevent waterlogging and root rot. Additionally, consider using techniques such as planting cover crops or implementing no-till practices to improve soil structure and fertility over time.
4. Water Management: Efficient water management is essential for maximizing production quality. Hemp plants require consistent but not excessive watering. Overwatering can lead to nutrient leaching, root rot, and other water-related issues. Conversely, underwatering can cause stress and hinder plant growth. Monitor soil moisture levels regularly and water your plants accordingly. Irrigation systems, such as drip or soaker hoses, can help deliver water directly to the root zone, minimizing evaporation and water wastage.
5. Nutrient Management: Providing your hemp plants with the right balance of nutrients is crucial for maximizing production quality. Conduct regular soil tests and foliar analysis to assess nutrient deficiencies or imbalances and adjust your fertilization practices accordingly. Consider using organic fertilizers or compost teas to promote healthy soil microbiology and enhance nutrient uptake by the plants. Remember to follow recommended application rates and avoid overfertilizing, as this can lead to nutrient burn and adversely affect the quality of your harvest.
By carefully considering and optimizing these factors in your growing location, you can maximize your hemp production quality and yield. Remember that each location may present unique challenges and opportunities, so adapt and customize your approach accordingly. With a well-optimized growing environment, you’ll be well on your way to producing high-quality hemp crops.
Germinating Your Hemp Seeds: A Step-by-Step Guide
Germination is the first and crucial step in the hemp planting process. It involves sprouting your hemp seeds and providing them with the optimal conditions for growth. Whether you are a beginner or a seasoned hemp grower, here is a step-by-step guide to help you successfully germinate your hemp seeds and get your crop off to a healthy start.
Step 1: Selecting Your Seeds
When it comes to germinating hemp seeds, it is essential to choose quality seeds from a reputable source. Consider factors such as seed viability, seed type (regular or feminized), and strain characteristics. Feminized seeds are often preferred as they ensure a higher likelihood of female plants, which produce the desired flower buds. However, if you are aiming for a breeding project or seeking genetic diversity, regular seeds may be your choice.
Step 2: Preparation
Before germinating your hemp seeds, prepare your germination materials. You will need a clean and sterile environment, such as a seed tray, paper towels, or small pots filled with a suitable grow medium like coco coir or soilless mix. Pre-moisten the grow medium with water to ensure a suitable level of moisture. Remember, hemp seeds need moisture to germinate, but too much water can suffocate them.
Step 3: Germination Methods
There are several methods you can use to germinate hemp seeds, but the most common and straightforward method is the paper towel method. Start by moistening a paper towel, then place the seeds on one half of the towel. Fold the damp paper towel over the seeds, covering them completely. This creates a warm and moist environment necessary for germination.
Step 4: Providing Optimal Conditions for Germination
Now that you have prepared your germination materials and seeds, it’s time to create an ideal environment for germination. Place the folded paper towel with the seeds in a sealable plastic bag or plastic container. Keep the container in a warm location with temperatures between 70 to 85°F (21 to 29°C) to encourage germination. Ensure that the location receives indirect light and remains undisturbed.
Step 5: Monitoring and Care
During the germination process, it is crucial to monitor the seeds regularly. Check the paper towel for moisture and ensure it remains damp but not soaked. If the paper towel dries out, re-moisten it with a spray bottle. Inspect the seeds for any signs of germination, such as the appearance of white taproots, which indicate that the seeds have sprouted.
Step 6: Transplanting Germinated Seeds
Once the seeds have germinated and sprouted taproots that are approximately 0.5 to 1 inch long, they are ready to be transplanted. Gently transfer the germinated seeds to your preferred grow medium, placing them root-side down at a depth of about 0.25 to 0.5 inches. Lightly cover the seeds with the grow medium, ensuring they are not exposed to direct light.
Step 7: Providing Proper Care for Seedlings
After transplanting, it is important to provide your seedlings with proper care. Place them in a well-lit area with a light spectrum suitable for the vegetative stage. If you are an indoor grower, a fluorescent light or LED grow light can provide the necessary light intensity. Maintain a temperature around 70 to 80°F (21 to 27°C) and ensure adequate airflow and ventilation to prevent the buildup of pests or disease.
By following these steps, you can successfully germinate your hemp seeds and give your plants a healthy head start. Remember to provide the optimal conditions for germination, monitor the process closely, and provide adequate care for your seedlings. With patience and proper care, you’ll soon have robust and healthy hemp plants ready for the next stages of growth and cultivation.
The soaking method is an alternative technique for germinating hemp seeds that some growers prefer over the paper towel method. This method involves placing the seeds in a container of water and allowing them to soak until they begin to sprout. Here is a step-by-step guide to successfully germinate your hemp seeds using the soaking method.
Step 1: Selecting Your Seeds
Just like with the paper towel method, it is essential to choose high-quality seeds from a reputable source. Consider factors such as seed viability and strain characteristics. Determine whether you want to use regular or feminized seeds based on your specific needs and goals.
Step 2: Preparation
Before starting the soaking method, gather your materials. You will need a clean and sterile container, preferably with a lid, and filtered or distilled water. It is important to use clean water to prevent any contaminants from interfering with the germination process.
Step 3: Soaking the Seeds
Fill your container with filtered or distilled water, ensuring there is enough water to cover the seeds and provide them with ample room for expansion. Gently place the seeds into the water, making sure they are fully submerged. Place the lid on the container to maintain a consistent environment and prevent evaporation.
Step 4: Providing Optimal Conditions
Now that your seeds are soaking, find a warm location with temperatures between 70 to 85°F (21 to 29°C) to place the container. Keep in mind that hemp seeds prefer darkness during germination, so find a spot away from direct light. Maintain a stable temperature and avoid moving or disturbing the container to allow the seeds to germinate undisturbed.
Step 5: Monitoring and Care
Check on the seeds periodically to monitor their progress. After 24 to 48 hours, you may begin to see signs of germination, such as small white taproots emerging from the seeds. However, some seeds may take longer to sprout, so be patient and continue monitoring.
Step 6: Transplanting Germinated Seeds
Once the seeds have sprouted taproots that are approximately 0.5 to 1 inch long, they are ready to be transplanted. Gently transfer the germinated seeds to your preferred grow medium, such as coco coir or a soilless mix. Place the seeds root-side down at a depth of about 0.25 to 0.5 inches and lightly cover with the grow medium.
Step 7: Providing Proper Care for Seedlings
After transplanting, provide your seedlings with the necessary care. Place them in a well-lit area with the appropriate light spectrum for the vegetative stage. Maintain a temperature around 70 to 80°F (21 to 27°C) and ensure proper airflow and ventilation to prevent any issues with pests or disease.
Remember, while the soaking method can be an effective way to germinate hemp seeds, it may not work for all seeds. Some seeds may require the paper towel method or other germination techniques. Experiment and find the method that works best for you and your specific seeds for a successful hemp planting experience.
The paper towel method is a popular technique for germinating hemp seeds. It is a simple and effective way to ensure a successful germination process. Here’s how to do it:
Step 1: Gather Your Materials
To start, gather all the materials you will need for the paper towel method. You will need high-quality hemp seeds, paper towels, a clean plate, and two clean and sterile plates or container lids.
Step 2: Prepare the Seeds
Take your hemp seeds and gently place them on one half of the paper towel. Make sure to space them out evenly, allowing room for each seed to sprout.
Step 3: Wet the Paper Towel
Once the seeds are on the paper towel, fold the other half of the paper towel over them. Take care not to press too hard as you want to maintain a moist but not overly wet environment.
Step 4: Moisture Control
Transfer the folded paper towel with the seeds onto a clean plate. Lightly moisten the plate with distilled or filtered water to create a humid environment. Be careful not to oversaturate the paper towel, as this can lead to rot or mold.
Step 5: Create an Enclosed Environment
Take the two clean plates or container lids and stack them on top of each other, placing the plate with the paper towel and seeds inside. This creates a dark and enclosed space for the seeds to germinate.
Step 6: Germination Period
Place the stack of plates or container lids in a warm and dark location with temperatures around 70 to 85°F (21 to 29°C). This provides the optimal conditions for germination. It’s important to note that the seeds should be kept away from direct light during this stage.
Step 7: Monitor and Wait
Check on the seeds every 24 to 48 hours to monitor their progress. After a few days, you should start to see the seeds sprouting and small taproots emerging from them. Some seeds may take longer to sprout, so be patient and continue to monitor.
Step 8: Transplanting the Germinated Seeds
Once the seeds have developed strong taproots that are approximately 0.5 to 1 inch long, they are ready to be transplanted. Gently transfer them to your chosen grow medium, ensuring the taproot is facing downwards. Cover the seeds with a light layer of the medium and provide them with gentle care.
The paper towel method is a straightforward way to germinate hemp seeds successfully. With proper care and attention, you can ensure healthy seedlings ready for further growth and cultivation.
After successfully germinating your hemp seeds, it’s time to move on to the next step of the hemp planting process – transplanting. Depending on your preferences and resources, you have the choice to either plant your hemp seeds in pots or directly in the outdoors.
Planting in Pots:
If you’re an indoor grower or have limited space, planting your hemp seeds in pots is a convenient and practical option. Here’s how you can go about it:
Step 1: Choose the Right Pot and Grow Medium
Select a pot that is appropriate in size for your hemp plant’s growth. It should have drainage holes at the bottom to prevent waterlogging. As for the grow medium, consider using coco coir or a mix of potting soil with perlite to provide your hemp plants with the necessary nutrients and proper drainage.
Step 2: Prepare the Pot
Fill the pot with your chosen grow medium, leaving about an inch of space at the top for watering.
Step 3: Transplanting the Seedlings
Carefully remove the germinated seeds from the paper towel and gently transfer them to the pot. Make sure to keep the taproot facing downwards and cover the seeds with a light layer of the grow medium.
Step 4: Provide Adequate Water and Light
Water the newly transplanted seedlings, ensuring that the grow medium is moist but not excessively wet. Place the pot in a location where your hemp plants will receive ample hours of light. If you don’t have access to natural sunlight, consider using fluorescent lights or other types of indoor grow lights to provide the necessary light spectrum.
Planting Outdoors:
If you have space available and favorable weather conditions, growing your hemp plants outdoors can yield excellent results. Here are the steps to follow:
Step 1: Prepare the Soil
Choose a well-draining soil rich in organic matter for your hemp plants’ root development. Clear the area of any weeds or unwanted plants that may compete for nutrients.
Step 2: Dig the Planting Holes
Dig holes that are slightly larger than the pot size in which your hemp plants are currently growing. Make sure to space the holes adequately to allow each plant to have enough room to grow.
Step 3: Transplanting the Seedlings
Gently remove the seedlings from the pots, being cautious not to damage their roots. Place each seedling into the prepared holes, ensuring that the taproot is facing downwards. Backfill the soil around the seedlings and lightly press it down to secure them.
Step 4: Provide Proper Care
Water the recently transplanted seedlings thoroughly, ensuring the soil is moist. Monitor the weather conditions and water accordingly to prevent the soil from drying out. Keep an eye out for any pests or diseases that may affect your plants and take appropriate measures to protect them.
Whether you choose to plant your hemp seeds in pots or outdoors, regular monitoring, proper watering, and providing them with the necessary light and nutrients are key to healthy seedlings and successful hemp cultivation. With time and care, you can enjoy a bountiful hemp harvest that can be used for a wide range of purposes such as hemp fiber, paper, and more.
In conclusion, successfully planting and transplanting hemp seeds is a crucial step in the journey of growing healthy hemp plants. Whether you choose to plant in pots indoors or directly in the outdoors, it’s important to provide the right conditions for your plants to thrive.
For indoor growers, using the right pot size and a suitable grow medium like coco coir or a mix of potting soil and perlite is essential. Transplanting the seedlings carefully and ensuring they receive adequate water and light will set them on the path towards healthy growth.
On the other hand, outdoor growers must prepare the soil well, removing any weeds or unwanted plants that can hinder the hemp plants’ growth. Digging appropriate planting holes and transplanting the seedlings properly will give them the necessary space to develop their roots and grow to their full potential. Providing proper care through watering, monitoring weather conditions, and protecting against pests and diseases will further support their growth.
Remember, hemp plants have a versatile growth cycle, and it’s important to understand the different stages such as vegetative and flowering. This knowledge will guide you in providing the right amount of light, nutrients, and care at each stage. Additionally, consider choosing feminized hemp seeds, which will ensure female plants and increase your chances of a successful harvest.
As with any agricultural endeavor, growing hemp can come with its challenges. However, with the right knowledge, preparation, and care, you can overcome tough times and cultivate healthy hemp plants that will reward you with bountiful harvests.
Whether you’re a beginner or an experienced grower, following a step-by-step hemp planting guide can help you achieve successful results. Don’t be afraid to experiment and learn from your experiences. With dedication and patience, you can become a skilled hemp cultivator, contributing to the thriving industry of hemp fiber, CBD products, and a wide range of other applications.
Stay informed about the latest developments in hemp cultivation and explore additional cannabis harvest methods to keep improving your techniques. By staying abreast of industry advancements, you can continue to refine your hemp planting practices and maximize your yields.
So, roll up your sleeves, gather your tools, and get ready to embark on the exciting journey of hemp cultivation. With the right approach and a passion for sustainable agriculture, you can make a positive impact in the world of hemp farming. Happy planting!